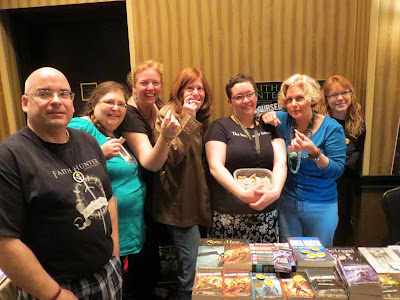
This fudge has become *very* popular.
It's crazy to be saying this, but I think I went through nearly 15 kilograms of white chocolate melting wafers between October (when I make a batch for SIWC) and June (when I cart another batch to ConCarolinas). This is typically a holiday treat, but here we are at the beginning of August, and I was invited to an online release-party last Thursday for A.J. Hartley's DARWEN ARKWRIGHT AND THE SCHOOL OF SHADOWS and I shared the above pic. Hey, why not? For me, writing events aren't complete without sharing my signature treat.
My point being, I had to hone my skills in order to produce quickly, efficiently, and still come out with this awesome edible art that looks gorgeous but doesn't take away too much from my writing time. So here's the updated recipe [and for variants and allergy-friendly versions, click here]:
Laura's Tiger Butter
Supplies:
1-2 baking sheets with edges, depending on size of sheet and desired thickness of tiger butter
Aluminum foil
Ingredients:
4-5 cups white chocolate melting wafers
1/2 cup milk chocolate melting wafers
1 1/4 cups regular peanut butter, smooth
TIP 1: Please note that the above supplies and ingredients are for a *single* batch. Given the treat's popularity and the demand for it, I tend to make it in much larger double-batches. (Doubles, I can manage. I tried making a quadruple batch once. That was not a good idea because I was racing around trying to catch the fudge before it all set. Lesson learned.)
TIP 2: Before mixing, ensure that the kitchen is warm, as colder conditions can make the freshly melted chocolate set too quickly.
TIP 3: Best if made on a full stomach.
TIP 4: Better if made in an empty house before certain sweet-toothed partners can "sample".
1. Line the cookie sheets with aluminum foil. Previously, I said waxed paper, but I found that it stuck sometimes. With foil, the finished product came away much more easily. Okay, the fact that I was out of waxed paper the first time I tried this and was forced to give it a shot may have been an impetus for the switch, but I am pleased with the new technique.
2. Next, melt the white chocolate wafers with 1 cup of the peanut butter. If you are blessed enough to own a double boiler, congratulations. Since I, like a lot of folks, don't, I melt it directly on the stove in a stainless steel pot on very low, stirring frequently so that the sugar doesn't crystallize. If it does it makes for crunchy tiger butter, and the smoothness of the product is one of its selling points, IMO.
3. Once the mix seems to be nearly there, melt the milk chocolate wafers with 1/4 cup of the peanut butter, also on low, also stirring frequently. This smaller mixture melts a lot faster than the white chocolate behemoth, which is why you should wait to start it until the white is nearly ready.
4. Pour the melted white chocolate into the pans first, being sure to evenly (at least sort of) distribute the mix between the pans. Be sure to spread the mix to the edges of the pan. Over four pans with my double batch, I can usually get a nice, regular but not too thick result.
5. Then, pour the milk chocolate over the white in lines (as globby as you like).
6. As quickly as possible, drag a spatula through the lines, swirling the milk chocolate in the white to create fancy random designs, as shown in the above photo. Do not over-swirl, as the chocolate eventually blurs together and messes up the design. Unless you like blurriness. Maybe that's your style. When done, if the surface of the mixture seems uneven, give the pans a gentle horizontal jostle so that the chocolate flattens out.
7. Place finished trays in freezer. This is to help the chocolate set quickly. In a pinch, the fridge could work, but not for the next three steps.
8. After waiting at least an hour (though more doesn't hurt) while working on your novel or query letter, or while catching up on your reading, remove from the freezer and place in a plastic bag.
9. Then drop the pan on the floor.
10. Now that the fudge has been artfully shattered, break the rest of the pieces into more manageable bites. (If you don't approve of violence, or decided to go the fridge route, a sharp knife drawn through the hardened candy works, too. But hey, this is art, right? And every artist's interpretation is different.
11. Variations:
a. Depending on how much of a swirl or blend you want, you could change the white chocolate / milk chocolate ratio. This will change the flavour.
b. Likewise, changing the peanut butter / chocolate ratio will also change the flavour. I like a nice balance that isn't *too* heavy on the PB, but isn't too light, either. In the previous rendition of the recipe, I used unsweetened/unsalted peanut butter for the milk chocolate portion, but frankly (and this goes back to the mass production situation in which I now find myself) I didn't find it made enough of a difference to bother. Gourmands and picky chefs, feel free to go to town with it.
I love to joke with people who make comments about the finished product. When asked how long it takes to make it, I answer, "Oh, I slaved over it for a day and a night." After their requisite sagely nod, I add, "I'm kidding. It takes half an hour."
12. Arrange neatly on a platter (see above).
13. Share!


No comments:
Post a Comment